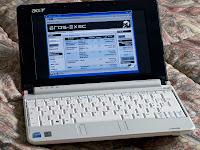
 AROS can't be yet installed on a netbook, since many parts are still missing: it's quite impossible to boot it up from a USB key or a memory card, and many required drivers are still not developed. There's no option to open a screen with a resolution of 1024x600, and no way to connect to a wireless network. However, I managed to install Icaros Desktop 1.1.1 on my Aspire One netbook and get a quite good experience. How? Using the latest virtualization techniques included in Qemu 10.1, that comes along with the new full DVD version of Icaros. The final result is AROS running at a reasonable speed (that's what you would expect from an Atom processor, minus some emulation overhead), with audio and wireless network support. In practice, what you really need for a good AROS experience on a netbook. Here's how I did it:
First step, preparing the host operating system
My Aspire One comes with Windows XP preinstalled, which is an advantage. This way, having an accelerated installation of Qemu is quite simple. I copied IcarosLive_1_1_1.7z.exe on a USB stick and connected it to the netbook, then I ran the auto-extracting archive and decided to expand files in C:\. A "Live" directory has been created automatically.
Once files have been expanded, you need to install the Kqemu.sys driver. This on provides acceleration for Qemu, so it will perform incredibly better than usual. To do that, you have to do only two things. Move with explorer into the \Live\Emulator\Kqemu directory and run the inskqemu.exe file. This is not enough, however. Right click on the kqemu.inf file, and choose "Install", then wait for Windows to end installation. If you can't see the kqemu.inf file, you have either to set up Windows to show hidden files, or at least to show extensions of known file types.
Second step, modifying Icaros start batch file
It's time to turn back to the \Live directory. Here you will find the Win32-START.bat file along with others. Right click on it, and choose "Modify". The batch file will be opened in notepad and shown as follow:
@REM Start qemu on windows.
@ECHO OFF
echo EMULATOR SPEED WARNING!
echo -----------------------
echo Icaros Desktop under Qemu will run CONSIDERABLY SLOWER than on
echo real hardware. Operations that normally need a few seconds
echo on real hardware, may take serveral minutes to complete
echo under Qemu. For istance, reading PDF manuals straight from
echo the DVD under Qemu will need a LOT of time. Don't ever take
echo Qemu times as indicative of the overall Icaros Desktop speed: it
echo isn't.
echo -----------------------
pause
net start kqemu
cd emulator
start qemu.exe -full-screen -L . -M "pc" -m 192 -cpu "qemu32" -vga vmware -serial vc -parallel vc -name "Icaros Desktop" -drive file=aroshdrive.img,index=0,media=disk -drive file="..\icaros-v111-pc-i386.iso",index=2,media=cdrom -boot d -soundhw ac97 -kernel-kqemu -net nic,vlan=0,model=pcnet -net user,vlan=0 -usb -localtime
The parts in red must be deleted
The parts in green must be added
Now, just run Win32-START.bat and live happy. Choose the 800x600 resolution to continue.
Third step, setting up AROS
Now that you have Icaros DVD virtually running on your netbook, open it and go to the /Tools drawer. Launch InstallAROS and follow the installing instructions in the Icaros guide as like as if you were installing it on a real computer. Once finished, close Qemu and modify the Win32-START.bat again. In the last line, look for this string:
-drive file="..\icaros-v111-pc-i386.iso",index=2,media=cdrom -boot d
and replace it with:
-cdrom d: -boot c
From now on, you'll have only to start AROS again and:
1) use automatic network settings
2) set up the AC97 device for audio in AHI, using it for music, unit0 and unit1 devices.
3) live happy with your almost-fully-working AROS installation on your netbook.


